Sewing guides empower users to master sewing machine techniques, from basic stitches to complex projects, while offering troubleshooting tips and creative inspiration for all skill levels.
1.1 Importance of Sewing Guides
Sewing guides are essential for anyone looking to master the use of a sewing machine. They provide step-by-step instructions that help users understand how to operate their machines effectively. Whether you’re a beginner or an experienced sewist, these guides offer valuable insights into maximizing your machine’s potential. They often include troubleshooting tips to address common issues, saving time and reducing frustration. Sewing guides also enhance creativity by explaining how to work with various fabrics, threads, and stitches. By following these guides, you can improve your sewing skills, complete projects more efficiently, and achieve professional-looking results. They serve as a comprehensive resource, ensuring you get the most out of your sewing machine and enjoy a rewarding sewing experience.
1.2 Benefits of Using a Sewing Machine
Using a sewing machine offers numerous benefits that make sewing more efficient and enjoyable. It allows for fast and precise stitching, saving time compared to hand-sewing. Sewing machines are ideal for large-scale projects, such as making curtains or sewing multiple garments. They also provide consistency, ensuring even stitch length and tension, which is difficult to achieve by hand. Additionally, sewing machines enable versatility, as they can handle various fabrics, from delicate silks to heavy canvases, with the right settings. Many modern machines come with built-in stitches, allowing for decorative stitching and embroidery. They also reduce physical strain, making sewing accessible to people with mobility or dexterity challenges. Overall, a sewing machine is a time-saving and creative tool that enhances sewing projects and expands possibilities for sewists of all skill levels.
1.3 Target Audience for Sewing Guides
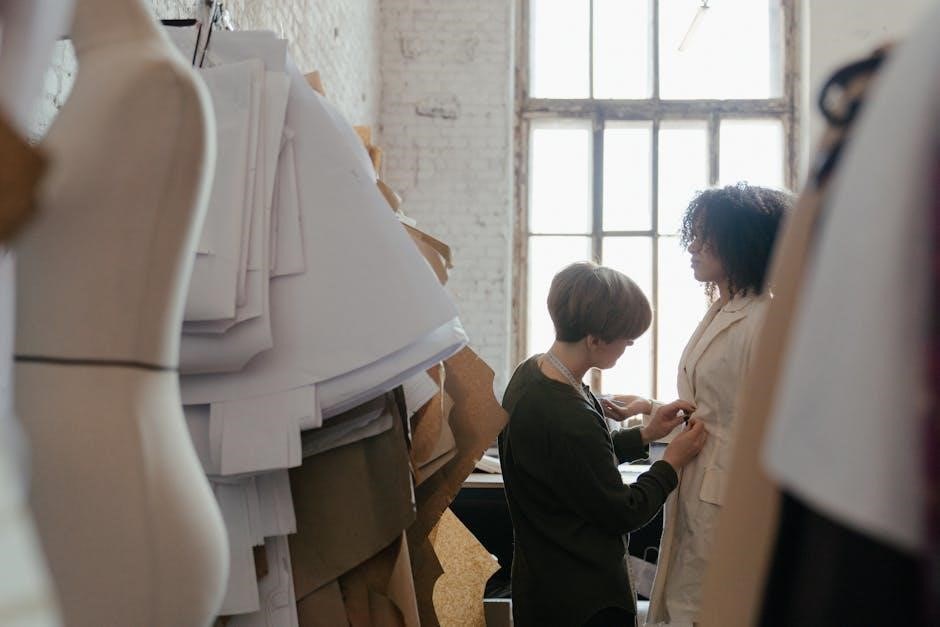
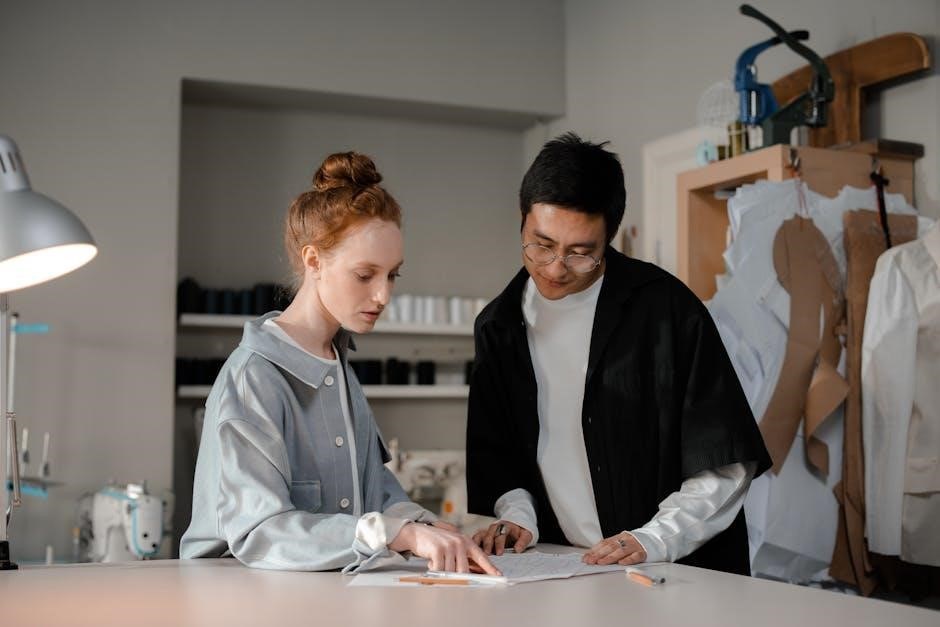
Sewing guides for sewing machines are designed to cater to a diverse range of individuals, ensuring that everyone can benefit from learning to sew. Beginners who are new to sewing will find these guides invaluable, as they provide step-by-step instructions to help build foundational skills. Hobbyists who enjoy crafting or DIY projects can enhance their creativity by learning machine-specific techniques. Home sewers looking to repair or create custom clothing or home decor will appreciate the practical tips and shortcuts. Additionally, crafters and DIY enthusiasts can expand their repertoire by mastering machine sewing. Even students in fashion or textile classes can use these guides to supplement their learning. Ultimately, sewing guides are tailored for anyone eager to unlock the full potential of their sewing machine and improve their sewing skills. They offer something for everyone, regardless of skill level.
Choosing the Right Sewing Machine
Selecting the right sewing machine involves understanding your needs, budget, and sewing goals. Consider the types of projects you’ll undertake, features required, and personal preferences to find the perfect match.
2.1 Guide for Beginners
For beginners, selecting the right sewing machine can feel overwhelming, but focusing on simplicity and essential features is key. Mechanical machines are often recommended as they are easier to use and less complicated than computerized ones. Look for a machine with basic stitch options, including a straight stitch, backstitch, and possibly a few decorative stitches. Avoid overcomplicating with too many features, as this can lead to confusion. Ensure the machine has adjustable stitch length and width, as well as a reverse stitching option. Portability and durability are also important factors. Consider brands known for reliability and customer support. A machine priced between $100 and $300 is typically a good starting point. Additionally, check for a warranty and included accessories like bobbins, needles, and a dust cover. Online tutorials and community forums can also provide guidance for new users. Always test the machine in person if possible to ensure it feels comfortable to use.
2.2 Features to Look For
When selecting a sewing machine, it’s essential to evaluate features that align with your sewing goals and skill level. Consider the type of machine—mechanical or computerized—and the number of stitches it offers. Basic machines typically include straight stitch, backstitch, and a few decorative options, while advanced models provide hundreds of stitches and embroidery capabilities. Adjustable stitch length and width are crucial for versatility. Automatic features like needle threading and tension control can enhance convenience; A free-arm design is useful for sewing cuffs and small projects. Durability and build quality, such as metal frames, are important for long-term use. Additionally, check for a warranty and customer support. If you plan to sew heavy fabrics, ensure the machine can handle thickness. Accessories like extra needles, bobbins, and presser feet are also valuable. By prioritizing these features, you can choose a machine that meets your needs and enhances your sewing experience.
2.3 Budget Considerations
Setting a budget is a critical step in selecting the right sewing machine. Sewing machines vary widely in price, ranging from basic models under $100 to advanced machines costing several thousand dollars. Entry-level machines are ideal for beginners, offering essential features at an affordable price. Mid-range machines, priced between $200 and $800, provide more versatility and durability. High-end models, often computerized, cater to experienced sewists and include advanced features like embroidery and automatic threading. Consider not only the initial cost but also long-term value, as higher-quality machines may last longer. Additionally, factor in the cost of accessories, such as presser feet or replacement parts. Setting a realistic budget ensures you invest in a machine that meets your needs without overspending. Researching and comparing prices can help you find the best value for your money.
Understanding Your Sewing Machine
Understanding your sewing machine is crucial for optimal performance and creating professional results. Familiarize yourself with its components, settings, and unique features to enhance your sewing experience and efficiency.
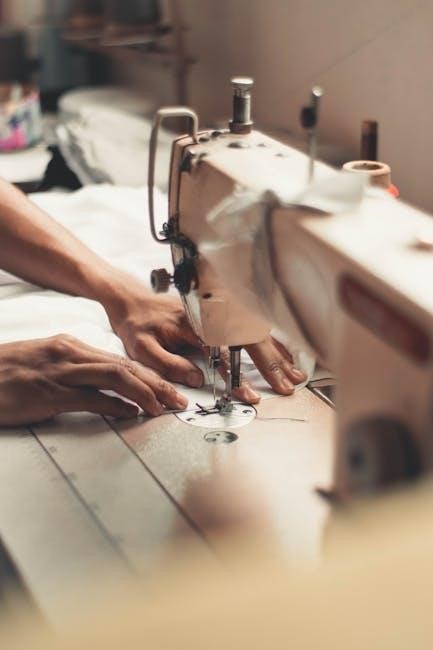
3.1 Basic Parts of a Sewing Machine
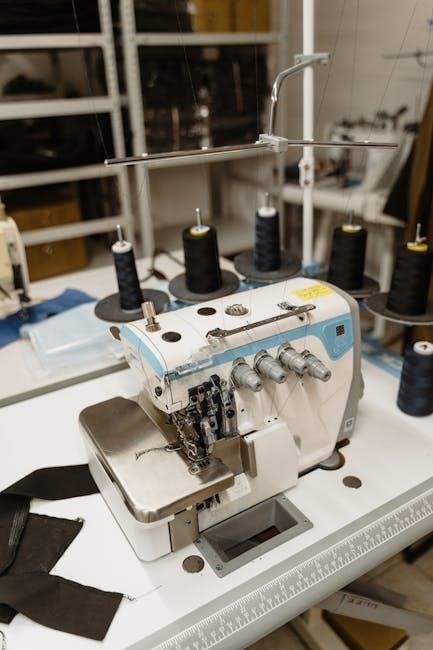
The basic parts of a sewing machine include the needle, bobbin, presser foot, spool pins, and handwheel. The needle moves up and down to create stitches, while the bobbin holds the bottom thread. The presser foot keeps fabric steady, and spool pins hold thread spools. The handwheel manually controls the needle’s movement, and the power switch turns the machine on/off. Additional components like the throat plate (covers the bobbin area) and stitch length regulator (adjusts stitch size) are essential. Understanding these parts helps you operate the machine effectively and troubleshoot issues. Familiarizing yourself with their functions ensures better control over your sewing projects and enhances your overall sewing experience.
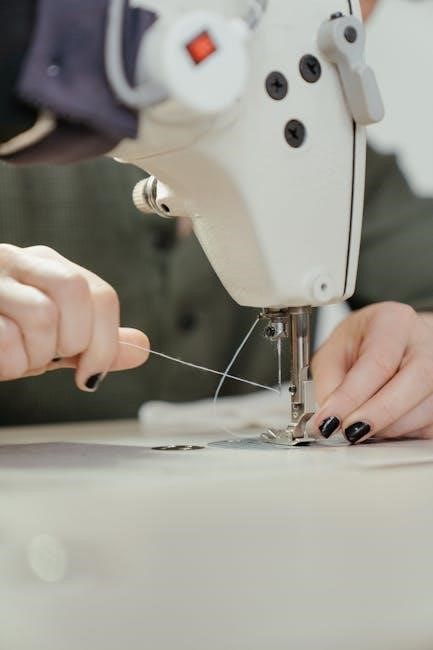
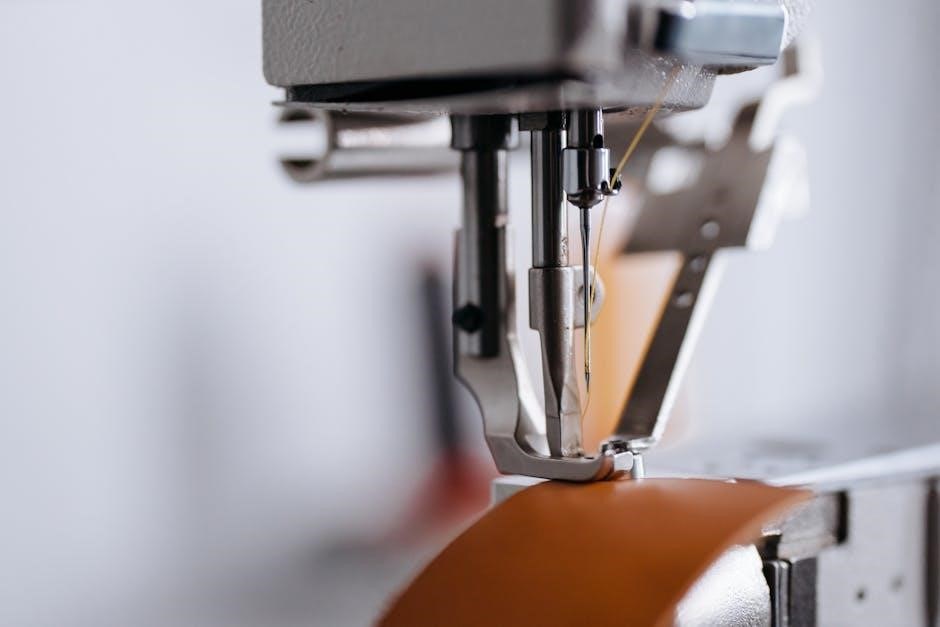
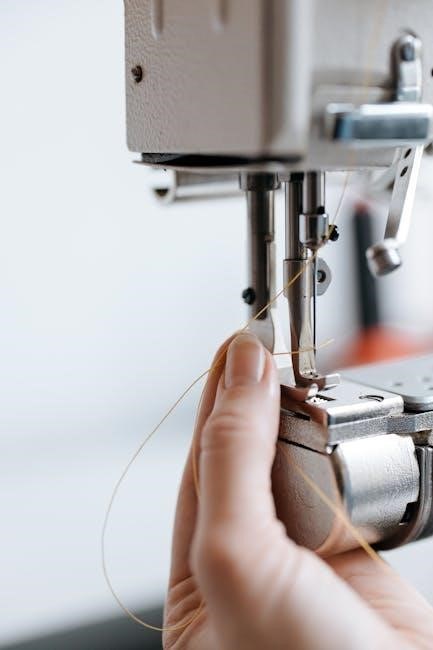
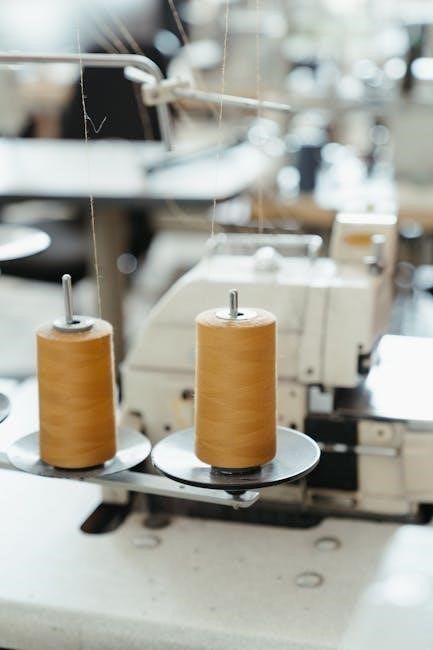
3.2 Threading and Bobbin Setup
Threading and bobbin setup are crucial for smooth sewing machine operation. Begin by removing the bobbin and threading the machine according to the manufacturer’s guide. Insert the bobbin into the bobbin case, ensuring it rotates correctly. Pull the thread gently to set the tension. Use the machine’s built-in diagram or manual for guidance; Proper threading ensures consistent stitches and prevents thread breakage. Always check the thread tension before sewing to avoid loose or tight stitches. If the bobbin thread is not properly seated, it can cause uneven stitching or fabric bunching. Practice threading and bobbin setup to master the technique and enjoy seamless sewing experiences. This step is foundational for all sewing projects, so taking the time to do it right is essential.
3.3 Stitch Selection and Tension
Stitch selection and tension are vital for achieving professional-looking results. Most sewing machines offer various stitch options, such as straight, zigzag, and decorative stitches, each suited for specific tasks. Selecting the right stitch ensures proper fabric handling and seam durability. Tension adjustment is critical to prevent loose or puckered fabric. Incorrect tension can lead to uneven stitching or thread breakage. Use the machine’s tension dials to fine-tune the upper and lower thread. Always test the stitch on scrap fabric before sewing your project. Proper tension ensures a balanced stitch, making your work look neat and professional. Refer to your machine’s manual for guidance on stitch selection and tension adjustment. Practice adjusting these settings to master your sewing machine and achieve flawless results.
Setting Up Your Sewing Space requires good lighting, a comfortable chair, a large sturdy table, storage for supplies, and a clean, dust-free environment to work efficiently.
4.1 Essential Tools and Accessories
Setting up your sewing space requires having the right tools and accessories. Essential items include a seam ripper, measuring tape, sewing scissors, pins, and a sewing gauge for accurate measurements. A iron and ironing board are crucial for pressing fabrics and seams. Additional accessories like extra bobbins, spools of thread, and embroidery hoops can enhance your sewing experience. A sewing box or container is helpful for organizing small items like buttons, zippers, and snaps. Fabric scraps and stabilizers are also useful for testing stitches or working with delicate materials. Having these tools within easy reach ensures efficiency and convenience while sewing. They help streamline the process, prevent delays, and allow you to focus on creating high-quality projects.
4.2 Organizing Your Workspace
Organizing your sewing workspace is key to efficiency and creativity. Start by designating a dedicated area for your sewing machine, ensuring good lighting and ventilation. Use shelves or bins to store fabrics, threads, and accessories, keeping them tidy and within reach. A sewing table with built-in storage can help maximize space. Keep frequently used tools like scissors, pins, and seam rippers in easy-to-access containers. Consider using a pegboard for hanging small tools and supplies. A cutting mat and rotary cutter are essential for fabric preparation. Maintain a clean and clutter-free environment to avoid accidents and distractions. Proper organization enhances productivity, reduces stress, and allows you to focus on your sewing projects. Regularly declutter and reorganize to keep your workspace functional and inspiring.
Basic Sewing Techniques
Essential skills for beginners include straight stitching, backstitching, and sewing straight seams. These techniques form the foundation for more complex projects. Mastering these basics ensures a strong start in sewing.
5.1 Straight Stitching
Straight stitching is the most basic and essential technique in sewing, used for seaming, topstitching, and repairing. It involves sewing in a straight line with uniform stitches.
- Set your machine to the straight stitch setting, usually indicated by a straight line symbol.
- Thread your machine and ensure the bobbin is properly inserted.
- Align the fabric edges under the presser foot, guiding it steadily.
- Start sewing slowly, maintaining consistent tension for even stitches.
Practice on scrap fabric to achieve accuracy and control. This stitch is versatile and forms the foundation for more complex techniques.
5.2 Backstitching
Backstitching is a reverse stitching technique used to reinforce seams, particularly at the beginning and end of a stitch line. It adds strength and prevents fraying, making it ideal for heavy-use areas like pockets or zippers.
- Select the backstitch option on your machine or use the reverse stitch button.
- Align the fabric under the presser foot and start sewing in reverse for 2-3 stitches.
- Switch to forward stitching and complete the seam, ending with another backstitch for security.
Backstitching ensures durability and is especially useful for thicker fabrics. Practice on scrap material to master the technique and achieve professional-looking results.
5.3 Sewing a Straight Seam
A straight seam is the most common type of seam used in sewing, ideal for joining two fabric edges in a straight line. It’s essential for garment construction, home decor, and crafting projects.
- Set your machine to the straight stitch setting for a basic seam.
- Align fabric edges under the presser foot, guiding them smoothly as you sew.
- Use a walking foot or even feed foot for consistent fabric movement.
- Backstitch at the beginning and end for durability.
Keep the fabric taut but not stretched. For thicker fabrics, reduce presser foot pressure. Press the seam after sewing for a professional finish. Practice on scrap fabric to perfect the technique.
Troubleshooting Common Issues
Identify and resolve sewing machine problems quickly to ensure smooth operation. Common issues include thread bunching, uneven stitches, or fabric dragging. Always check tension settings, threading, and needle condition.
- Inspect thread for tangles or knots.
- Ensure proper bobbin installation and tension.
- Use the correct needle for fabric type.
Refer to the user manual for specific solutions. Regular maintenance prevents many issues. Clean the machine and oil moving parts as needed. Always unplug before servicing.
6.1 Machine Not Turning On
If your sewing machine fails to turn on, start by checking the power source. Ensure the machine is properly plugged into a functioning outlet. Verify that the power cord is undamaged and securely connected to both the machine and the electrical outlet. Test the outlet with another device to confirm it’s working. If using a surge protector, check that it’s operational. Next, inspect the power switch for any visible damage or wear. Some machines have a fuse or circuit breaker; consult your manual to locate and reset it if necessary. If the issue persists, examine the plug for signs of damage or corrosion. If all checks fail, refer to your user manual or contact a professional technician. Always prioritize safety when troubleshooting electrical issues. Regular maintenance can help prevent such problems. If unsure, seek expert assistance to avoid further complications.
6.2 Thread Breakage
Thread breakage is a common issue that can disrupt your sewing workflow. To address this, first, check the thread quality and ensure it’s suitable for your fabric type. Old or low-quality thread is more prone to breaking. Next, inspect the needle for damage or dullness, as a blunt needle can cause excessive friction and lead to thread breakage. Verify that the needle is correctly sized for your fabric and thread. Additionally, ensure the tension settings are balanced; overly tight tension can stress the thread, causing it to snap. Check for any debris or lint in the machine’s tension discs or bobbin area, as this can interfere with thread flow. Also, make sure the thread is properly threaded through the machine’s guides and take-up lever. If the issue persists, try using a different spool of thread or adjusting the stitch length. Regular maintenance, like cleaning the machine, can also help prevent this problem. Always refer to your machine’s manual for specific guidance. By addressing these factors, you can minimize thread breakage and maintain smooth sewing operations. Keep in mind that thread breakage can often be resolved with simple adjustments and proper maintenance. If the problem continues, consider consulting a professional technician. Proper thread handling and machine care are key to avoiding this frustration. Remember, consistent tension and the right needle size are critical for seamless stitching. Avoid using damaged or frayed threads, as they are more likely to break during operation. Finally, ensure your sewing area is free from drafts, as air movement can sometimes cause thread instability. By following these steps, you can enjoy uninterrupted sewing sessions and achieve professional-quality results. Always prioritize thread quality and machine setup to prevent breakage and ensure optimal performance.
Advanced Sewing Techniques
Mastering advanced sewing techniques enhances creativity and precision. Explore working with diverse fabrics, installing zippers, and sewing buttons professionally. These skills elevate projects to a polished level.
7.1 Zippers and Buttons
Installing zippers and sewing buttons are essential skills for creating professional-looking garments and accessories. When working with zippers, use a zipper foot for precise alignment and smooth stitching. Start by basting the zipper in place, then sew along both sides using a straight stitch. For buttons, choose the right type (sew-on or shank) and position them evenly. Use a buttonhole foot for shank buttons to secure them firmly. Always pre-mark button placement with chalk or pins for accuracy. Reinforce buttonholes with stabilizer material to prevent stretching. Practice these techniques to achieve a polished finish on jackets, bags, or home decor projects. Mastering zippers and buttons opens up endless creative possibilities in sewing.
7.2 Working with Different Fabrics
When sewing with various fabrics, it’s essential to understand their unique properties and adjust your machine settings accordingly. Cotton, linen, and polyester are sturdy fabrics that work well with standard settings, while delicate materials like silk or chiffon require a finer needle and shorter stitch lengths. Knit fabrics, such as jersey or fleece, need a stretch stitch or zigzag setting to maintain elasticity. Heavier fabrics like denim or canvas may require a heavier-duty needle and increased tension. Always test scraps of fabric to ensure proper stitch formation and avoid puckering or stretching. Using the right presser foot, such as a walking foot for thick layers, can improve results. Experimenting with different fabrics expands your sewing capabilities and enhances the quality of your projects. Proper fabric handling ensures professional-looking results every time.
Thank you for completing our sewing guide. We hope you’ve learned valuable skills to enhance your sewing projects. Happy sewing, and enjoy creating something truly beautiful!
8.1 Summary of Key Points
In this comprehensive guide, we’ve covered essential aspects of sewing guides for sewing machines. Understanding the basics, such as threading, bobbin setup, and stitch selection, is crucial for effective sewing. We explored techniques like straight stitching, backstitching, and sewing straight seams, which form the foundation of most projects. Troubleshooting common issues, like thread breakage or machine malfunction, was also addressed to help you overcome challenges. Advanced techniques, such as working with zippers, buttons, and various fabrics, were introduced to expand your sewing capabilities. Budget considerations and choosing the right machine for your needs were emphasized to ensure a smooth sewing experience; By following these guidelines, you’ll be well-equipped to tackle a wide range of sewing projects with confidence and creativity.
8.2 Encouragement to Keep Practicing
Consistent practice is key to mastering sewing with your machine. The more you sew, the more comfortable and skilled you’ll become. Even small projects, like simple seams or repairs, can enhance your proficiency. Don’t be afraid to experiment with different fabrics and techniques to keep your practice sessions engaging. Set achievable goals for each session to track your progress and stay motivated. Remember, mistakes are part of the learning process, and they often lead to valuable insights. Dedicate a specific time each week to practice, and watch your skills improve over time. Sewing is a rewarding craft, and with persistence, you’ll enjoy the satisfaction of creating something truly unique and personalized. Keep pushing forward, and soon you’ll unlock the full potential of your sewing machine!